
This guide will help you prepare your OpenERP instance to use the Webkit reporting engine - a reporting engine rendered by webkit and powered by HTML and Python mako templates.
It assumes you are using OpenERP version 6.1, but the steps won't be too different for newer versions. If you are successful with other versions please let me know with a comment so I can update these notes for future users :)
Installation
- Install the report_webkit module and optional report_webkit_sample module (recommended for first time use)
- Download the wkhtmltopdf package from here. To choose the correct file:
- Make sure the filename column says wkhtmltopdf
- Make sure the Summary + Labels column has your operating system in it
- Extract the file to a safe place on your computer
- For Windows, something like c:\program files\openerp\wkhtmltopdf
- For linux, something like /usr/share/openerp/wkhtmltopdf
- Tell OpenERP where to find wkhtmltopdf:
- Go to Settings > Configuration > Parameters > System Parameters
- Create a record with name ‘webkit_path’ and set the value to the absolute path to the binary you downloaded earlier
Tips for Ubuntu users:
- Make sure the wkhtmltopdf deb package is uninstalled
sudo apt-get remove wkhtmltopdf
- Install the pre-requisites:
sudo apt-get build-dep libqt4-gui libqt4-network libqt4-webkitsudo apt-get install openssl build-essential xorg git-core git-doc libssl-dev
Create a Report
- First, create a report record similar to the one in the screen shot below, by going to:
- v6.0 / 6.1 Settings > Customization > Low Level Objects > Actions > Reports
- v7 Settings > Technical > Actions > reports
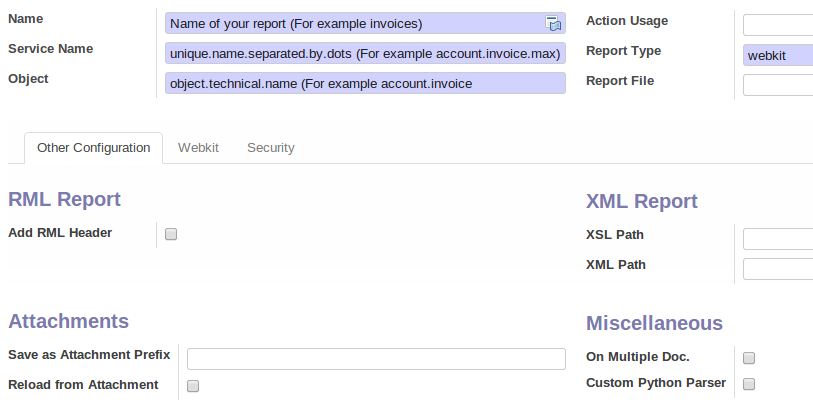
(Notice the Webkit tab only appears once you have set the Report Type to webkit)
- Once you have saved your report record, make a note of it's ID from the URL. It will look something like this: #id=987

- Now create an Action Binding similar to the one in the screenshot below by going to:
- v6.0 / 6.1: Settings > Customization > Low Level Objects > Actions > Action Bindings
- v7 Settings > Technical > Actions > Action Bindings

- Navigate back to your Report record and in the WebKit tab, paste the code from the file you can download below:
Download Example Mako: webkit_demo.mako
All done. You should now be able to browse to the object that you created your report for and generate the report!
Also, check out the mako syntax and the webkit reports included inside the report_webkit_samples for some help writing your own Mako
Note: To change headers, footers and logos, you must setup your WebKit Headers/Footers and WebKit Images by going to Settings > Companies > WebKit. To then make a report use these headers and footers, make sure you untick “Add RML header” and create / choose a webkit header / footer on the webkit tab
